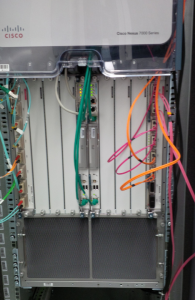
In one of our datacenters we started to experience increased number of errors on some ports. The reason was congestion, so the switches stared to drop some packets.
Physical installation
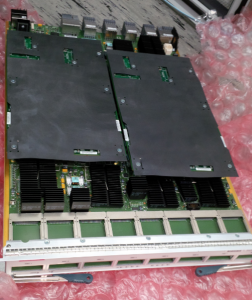
We decided to install additional 8-port 10 Gbps XL Module for Nexus 7010 chassis (N7K-M108X2-12L), see the picture below:
The installation can be done without an impact on forwarding plane of first module. Before touching anything be sure that you’re properly grounded with antistatic wrist strap.
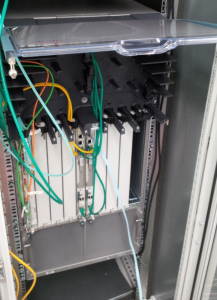
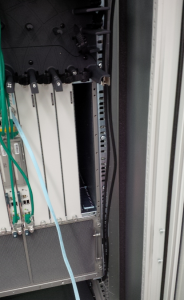
Be sure to remove module slot cover (N7K-MODULE-BLANK)
Cisco recommends not to leave the slot open for more than certain time, as it might disrupt the air flow inside the chassis therefore proper cooling.
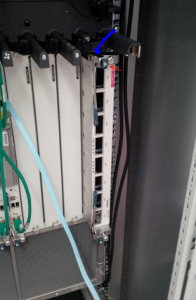
After the cover has been removed you can carefully insert the XL module into the chassis, make sure that levers are on the left side of the line card (blue arrow), as shown on picture below:
If the levers are closed, you can release them by pressing the button next to each of them (red arrow).
After the module has been inserted, we need to close the levers and the module will be fixed to the chassis. Don’t forget to tight the screws.
When you’re done it should look like this (pardon the cabling :))
CLI messages
It was also interesting to see the messages during installation of new XL module:
2015 Jun 10 10:16:41.960996 n7k1 %PLATFORM-2-MOD_DETECT: Module 10 detected (Serial number JAF1537ARNE) Module-Type 10 Gbps Ethernet XL Module Model N7K-M108X2-12L
2015 Jun 10 10:16:42.016896 n7k1 %PLATFORM-2-MOD_PWRUP: Module 10 powered up (Serial number JAF1537ARNE)
2015 Jun 10 10:16:42.016957 n7k1 %PLATFORM-5-MOD_STATUS: Module 10 current-status is MOD_STATUS_POWERED_UP
2015 Jun 10 10:17:35.615490 n7k1 %BIOS_DAEMON-SLOT10-5-BIOS_DAEMON_LC_PRI_BOOT: System booted from Primary BIOS Flash
2015 Jun 10 10:18:33.853379 n7k1 %PIXM-4-PIXM_SYSLOG_MESSAGE_TYPE_WARNING: Port Channel load balance hash configuration: Mode – NON-MODULO-F2 Status – SUCCESS
2015 Jun 10 10:18:33.912249 n7k1 %VDC_MGR-5-VDC_STATE_CHANGE: vdc 1 state changed to updating
2015 Jun 10 10:18:33.916400 n7k1 %VDC_MGR-5-VDC_STATE_CHANGE: vdc 1 state changed to active
2015 Jun 10 10:18:47.974110 n7k1 %ETHPORT-5-IF_DOWN_NONE: Interface Ethernet10/1 is down (Transceiver Absent)
2015 Jun 10 10:18:47.974837 n7k1 %ETHPORT-5-IF_DOWN_NONE: Interface Ethernet10/2 is down (Transceiver Absent)
2015 Jun 10 10:18:47.975337 n7k1 %ETHPORT-5-IF_DOWN_NONE: Interface Ethernet10/3 is down (Transceiver Absent)
2015 Jun 10 10:18:47.975815 n7k1 %ETHPORT-5-IF_DOWN_NONE: Interface Ethernet10/4 is down (Transceiver Absent)
2015 Jun 10 10:18:47.976300 n7k1 %ETHPORT-5-IF_DOWN_NONE: Interface Ethernet10/5 is down (Transceiver Absent)
2015 Jun 10 10:18:47.976818 n7k1 %ETHPORT-5-IF_DOWN_NONE: Interface Ethernet10/6 is down (Transceiver Absent)
2015 Jun 10 10:18:47.977310 n7k1 %ETHPORT-5-IF_DOWN_NONE: Interface Ethernet10/7 is down (Transceiver Absent)
2015 Jun 10 10:18:47.977789 n7k1 %ETHPORT-5-IF_DOWN_NONE: Interface Ethernet10/8 is down (Transceiver Absent)
2015 Jun 10 10:18:49.971308 n7k1 %PLATFORM-5-MOD_STATUS: Module 10 current-status is MOD_STATUS_ONLINE/OK
2015 Jun 10 10:18:49.973336 n7k1 %MODULE-5-MOD_OK: Module 10 is online (Serial number: JAF1537ARNE)
2015 Jun 10 10:18:49.200758 n7k1 %SYSMGR-SLOT10-5-MODULE_ONLINE: System Manager has received notification of local module becoming online.
As you can see from the output, it took about 2 mins. after inserting for module to became online.
So now we can check the status of newly available ports:
n7k1# sh int statu
——————————————————————————–
Port Name Status Vlan Duplex Speed Type
——————————————————————————–
mgmt0 — connected routed full 100 —
Eth1/1 — connected trunk full 10G 10GBASE-SR
Eth1/2 — connected trunk full 10G 10GBASE-SR
Eth1/3 — connected trunk full 10G 10GBASE-SR
Eth1/4 — connected trunk full 10G 10GBASE-SR
Eth1/5 — connected trunk full 10G 10GBASE-SR
Eth1/6 — connected trunk full 10G 10GBASE-SR
Eth1/7 — connected trunk full 10G 10GBASE-SR
Eth1/8 — connected trunk full 10G 10GBASE-SR
Eth10/1 — xcvrAbsen 1 auto auto —
Eth10/2 — xcvrAbsen 1 auto auto —
Eth10/3 — xcvrAbsen 1 auto auto —
Eth10/4 — xcvrAbsen 1 auto auto —
Eth10/5 — xcvrAbsen 1 auto auto —
Eth10/6 — xcvrAbsen 1 auto auto —
Eth10/7 — xcvrAbsen 1 auto auto —
Eth10/8 — xcvrAbsen 1 auto auto —
The newly installed module got number 10 and it supports only X2 transceivers, so after inserting each of them you’ll get something like this:
2015 Jun 10 10:33:18.999545 n7k1 %ETHPORT-5-IF_HARDWARE: Interface Ethernet10/1, hardware type changed to 10G
2015 Jun 10 10:33:25.896133 n7k1 %ETHPORT-5-IF_HARDWARE: Interface Ethernet10/2, hardware type changed to 10G
2015 Jun 10 10:33:32.392826 n7k1 %ETHPORT-5-IF_HARDWARE: Interface Ethernet10/3, hardware type changed to 10G
2015 Jun 10 10:33:38.586634 n7k1 %ETHPORT-5-IF_HARDWARE: Interface Ethernet10/4, hardware type changed to 10G
2015 Jun 10 10:33:56.427247 n7k1 %ETHPORT-5-IF_HARDWARE: Interface Ethernet10/5, hardware type changed to 10G
2015 Jun 10 10:34:05.049648 n7k1 %ETHPORT-5-IF_HARDWARE: Interface Ethernet10/6, hardware type changed to 10G
2015 Jun 10 10:34:31.258721 n7k1 %ETHPORT-5-IF_HARDWARE: Interface Ethernet10/7, hardware type changed to 10G
2015 Jun 10 10:37:53.864582 n7k1 %ETHPORT-5-IF_HARDWARE: Interface Ethernet10/8, hardware type changed to 10G
Additional links
More details on installing I/O modules for N7K chassis can be found here:
